XECUTE Client
XECUTE Client (XECUTE) is the application where the day-to-day scheduling work is performed. To open XECUTE follow the steps below.
-
Configure the site in XECUTE Config and set it to Active. A site must be active before it will appear in XECUTE.
-
Click the connection service icon
 to the upper right of XECUTE Client screen to open the Site Selection pop-up window.
 -
If the connection icon is red, click it to open the connection profile window.
-
Check the profile settings for the EPF server. See Connect to a server. A connection to an EPF server is required before XECUTE environments will appear.
-
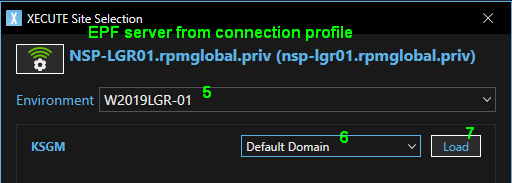
Select an Environment to connect to (typically there is one environment, however multiple XECUTE servers can connect to one EPF server).
-
Select the Spatial Domain to use for the site. The Default Domain is auto-generated is selected by default.
-
Click the Load button next to the site to open the site.
Site Loading Options
[Optional] Ctrl-click the Load button to bring up the site load options. Make a selection and click the Load button.
-
Load without local cache deletes all files in the local cache forcing a download of all site data from the server.
-
Load without topography animation - XECUTE will not animate the removal of topography in mined areas. (Typically used if you experience a Mesh.dll exception during site load)
-
Overview
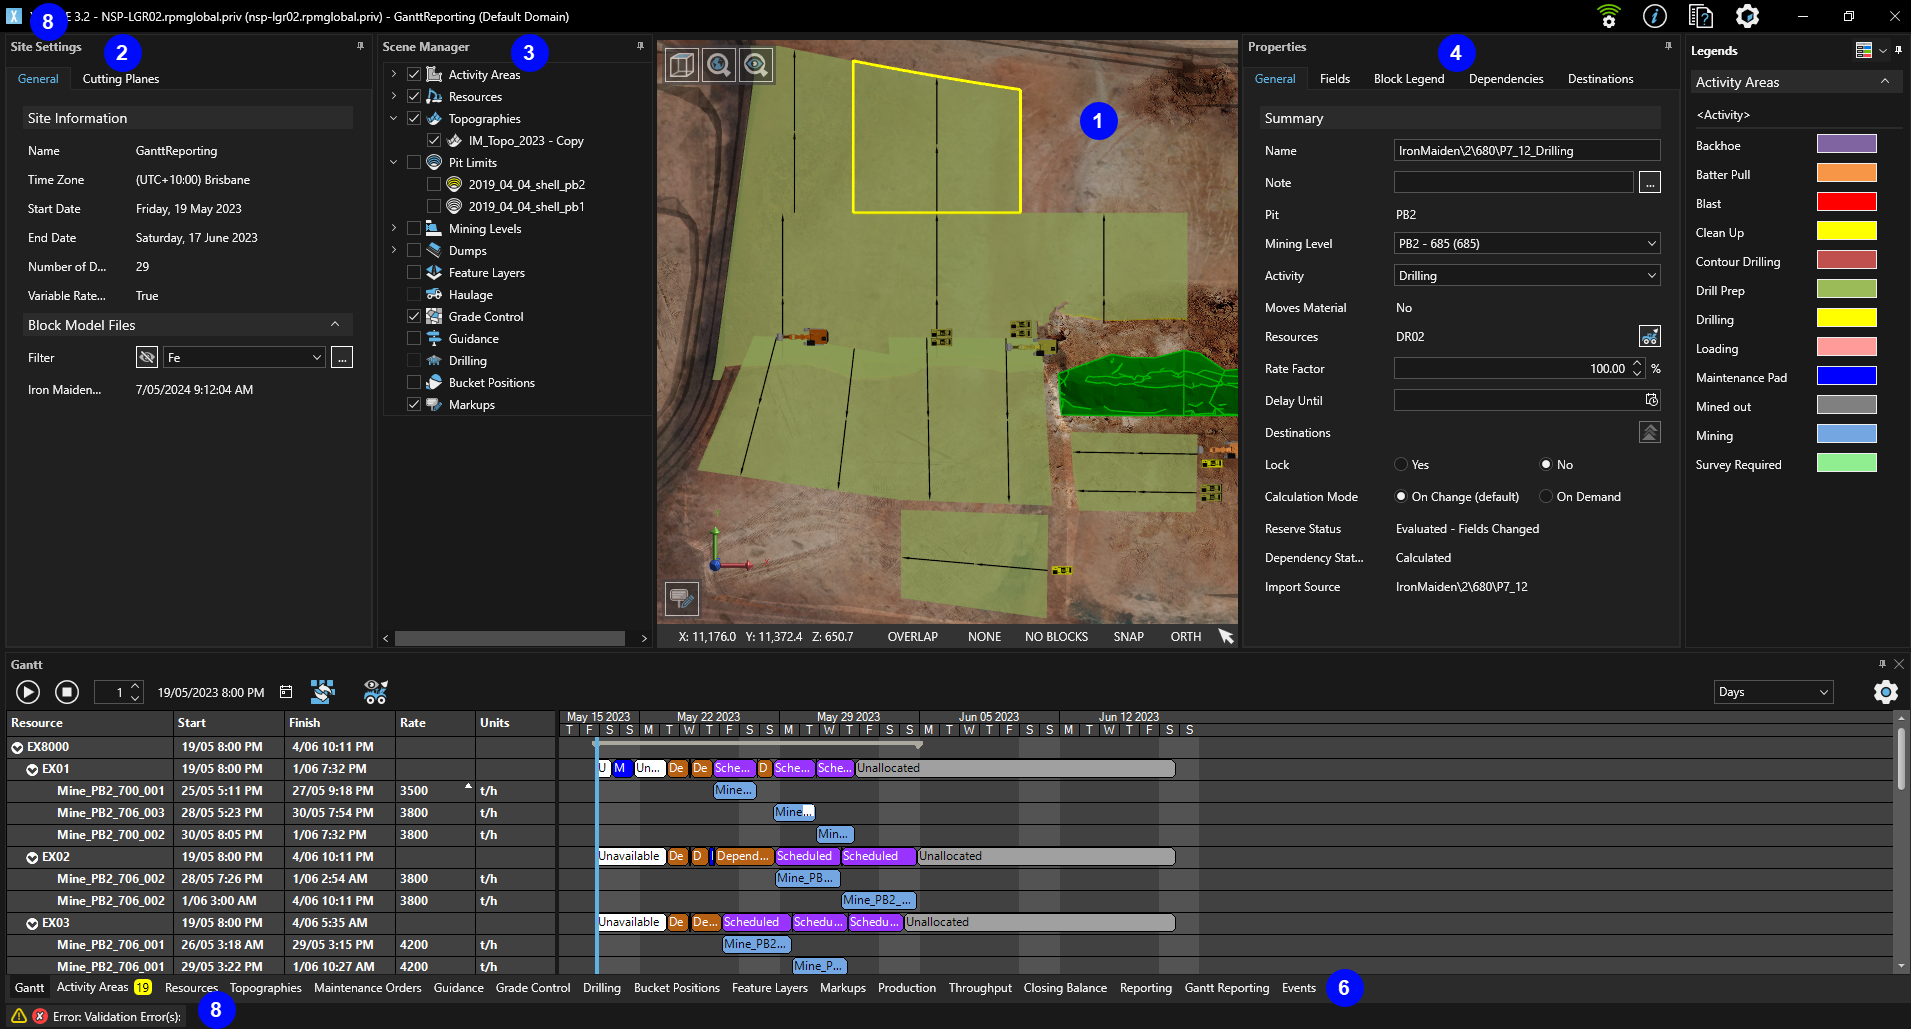
The XECUTE screen comprises dockable windows that enable interactive scheduling using a simple, clean user interface.
Typically, planners will create activity areas (discrete physical areas that represent mine-related tasks) in the 3D Scene. An activity area solid is created by XECUTE from the user-configured shape. The lower surface (floor) of the solid is set by the Mining Level defined during its creation. The upper surface (roof) is set from any overlying activity areas or topographical surface.
When an activity area solid is created, it is reserved against the block model data to determine the quantity of the material to be assigned to the mine equipment (for example drills, excavators). When the equipment (Resources) are assigned to an activity area, the activity area displays as a task in the Gantt chart.
The length of the task in the Gantt chart is determined by the production rate of the equipment assigned to the task and the quantity of the material to be acted on. Tasks in the Gantt chart can be manipulated to achieve the desired schedule target.
The sequence of the tasks within a schedule can be visualised by running the schedule or moving the timeline. As the tasks are performed, the activity areas in the 3D Scene are 'mined out' while obeying any dependencies.
To validate the planned schedule of mine material, a series of tabs are located at the bottom of the screen to show mine production, throughput and custom reports.
| Feature | Description |
|---|---|
| 1 | 3D Scene The 3D interactive area to work with mining shapes. |
| 2 |
Site Settings
|
| 3 |
Scene Manager Panel to control the visibility of all scene items. Items are arranged by category and have a hierarchical structure. To enable the visibility of an item, select the corresponding check box. |
| 4 |
Properties of the selected 3D Scene item
|
| 5 | Gantt chart The task scheduling window that lists the activity areas assigned to the Resources and the tasks to perform against the activity areas. |
| 6 |
Tab bar to show information about the schedule.
|
| 7 |
XECUTE menu.
|
| 8 |
Click the Status icon to show detailed information about the schedule run state. |
 to open the menu.